Receiving images from weather satellites
2023-08-31
Introduction
A few months ago, I came across a video on YouTube about the topic on how you can listen to weather satellites using a ham radio. Not long after that, I was already reading about software defined radios, a device that you can plug into your computer and listen to the radio spectrum with an appropriate antenna connected to it. I spent the next few days with researching this topic, it really got my attention, I knew that I had to buy one to try it out.
These USB dongle SDRs have evolved from simple DVB-T receivers after it was discovered that with custom drivers you can not only use them to receive terrestrial television broadcast but basically anything else they could pick up on the radio spectrum. First, I thought a cheaper TV receiver one with the right drivers would be enough for me, but after reading more about them I decided to go for a proper SDR that maybe is more expensive but offers more to make it worth the prize. After a few weeks of waiting it finally arrived, and now I could listen to anything I could pick up with my antenna on the radio spectrum, simple radio stations, taxi radios, air traffic control, and of course, weather satellites.
Disclaimer: this post is more about what I found out along the way than any kind of a tutorial on the subject, as I'm sure there are a couple of things that I didn’t get right, and maybe even some things that I've overlooked. The point of this post is to summarize everything I’ve learned about this topic, and of course, to make this hobby pique your interest after reading.
Software defined radio
So, what exactly is an SDR? Radio components such as modulators, demodulators and tuners are traditionally implemented in analogue hardware components, an SDR allows most of these traditionally hardware-based components to be implemented in software instead, on your computer. Hence, the term software defined radio.
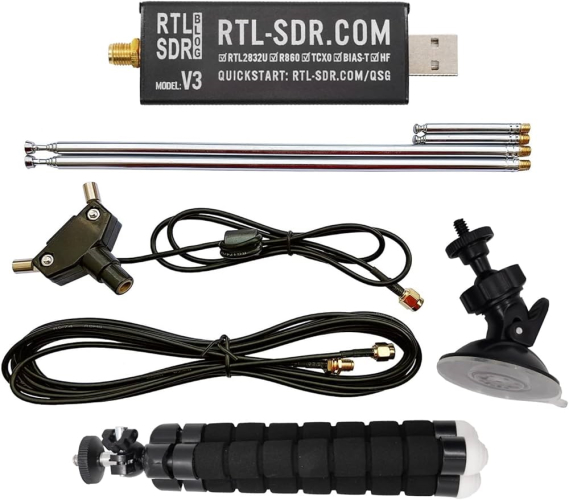
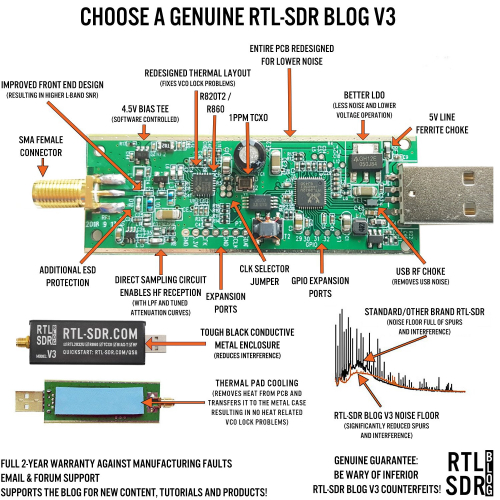
The SDR I bought is the RTL-SDR Blog V3 USB dongle, which can receive frequencies from 500 kHz up to 1.75 GHz. This seemed like a great SDR to start with, many people recommending it. I bought the kit version, so it came with not just the SDR but with a basic telescopic dipole antenna, a small tripod and with a few metres of coaxial cable too.
Weather satellites
Weather satellites are used to monitor the weather conditions on Earth. These satellites can be either geostationary (e.g. GOES), or low earth orbit, polar orbiting satellites (e.g. NOAA satellites).
Geostationary satellites are synchronized to the Earth’s rotation, meaning that it is always seeing the same area of the Earth as it is orbiting, they are in a fixed position relative to Earth. These satellites are orbiting at a height of around 36 thousand kilometres. Since these satellites are so far away, the signal gets weak by the time it gets to Earth, meaning that you would need a big dish antenna to pick up anything. Because I don’t own a dish antenna and don’t want to spend on one and can't really set it up anywhere properly this was out of question for me.
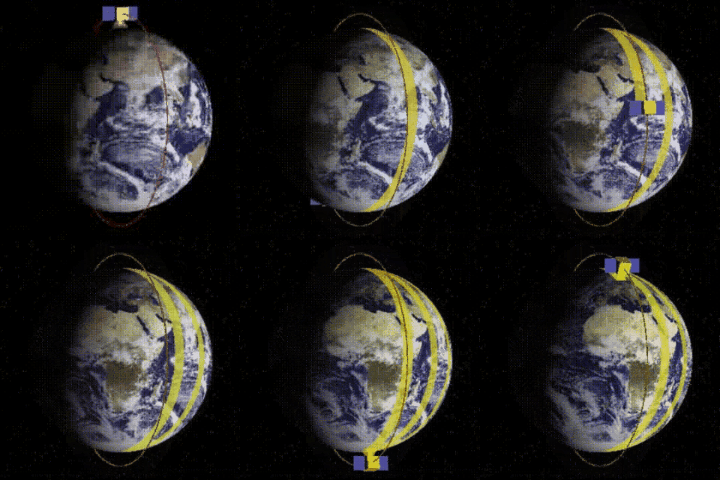
My focus was on polar orbiting weather satellites because you don’t really need any expensive equipment for receiving them, so it was easier to start with these. They orbit at a much smaller distance from the Earth, so it’s easier to pick up their signal with a basic antenna. They are flying around in a low orbit from pole to pole as the Earth rotates beneath them, always seeing a narrow strip of the ground. These satellites are sun synchronous, meaning that they always fly over at around the same time each day. The polar orbiting weather satellites that we will take a look at are NOAA-15, NOAA-18, NOAA-19, and METEOR M2-3.
NOAA and Meteor M2 satellites
🇺🇸 NOAA satellites are weather forecasting satellites owned by the United States’ National Oceanic Atmospheric Administration (NOAA). These satellites transmit analogue signals, called automatic picture transmission (APT) at 137 MHz and are orbiting the Earth every 101 minutes.
The launch of NOAA-15 began the fifth generation of NOAA’s Polar Orbiting Satellite Series (POES), which consists of five satellites, however, nowadays only three of them are operational.
| Name | Frequency (MHz) | Launched | Altitude | Inclination |
| NOAA-15 | 137.62 | 1998 May 13 | 813 km | 98.6° |
| NOAA-18 | 137.9125 | 2005 May 20 | 870 km | 98.75° |
| NOAA-19 | 137.1 | 2009 February 6 | 870 km | 98.75° |
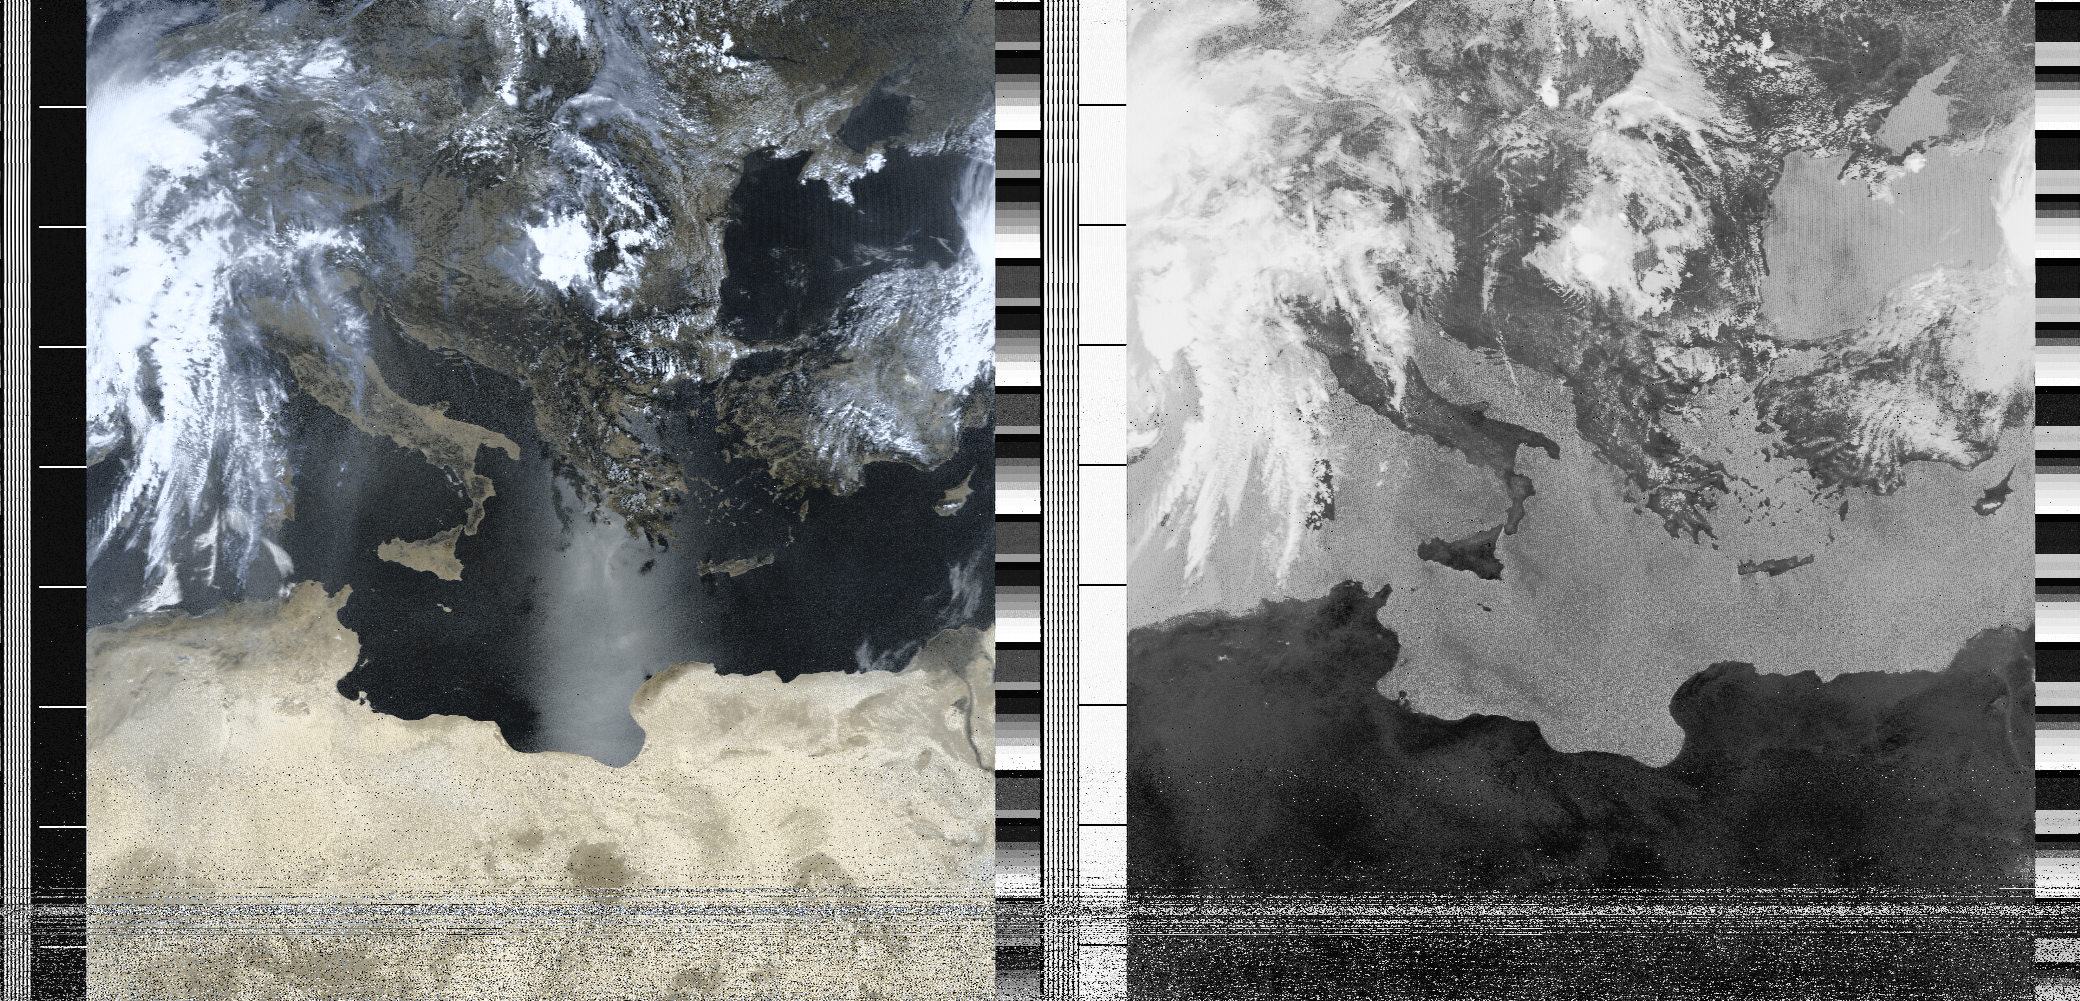
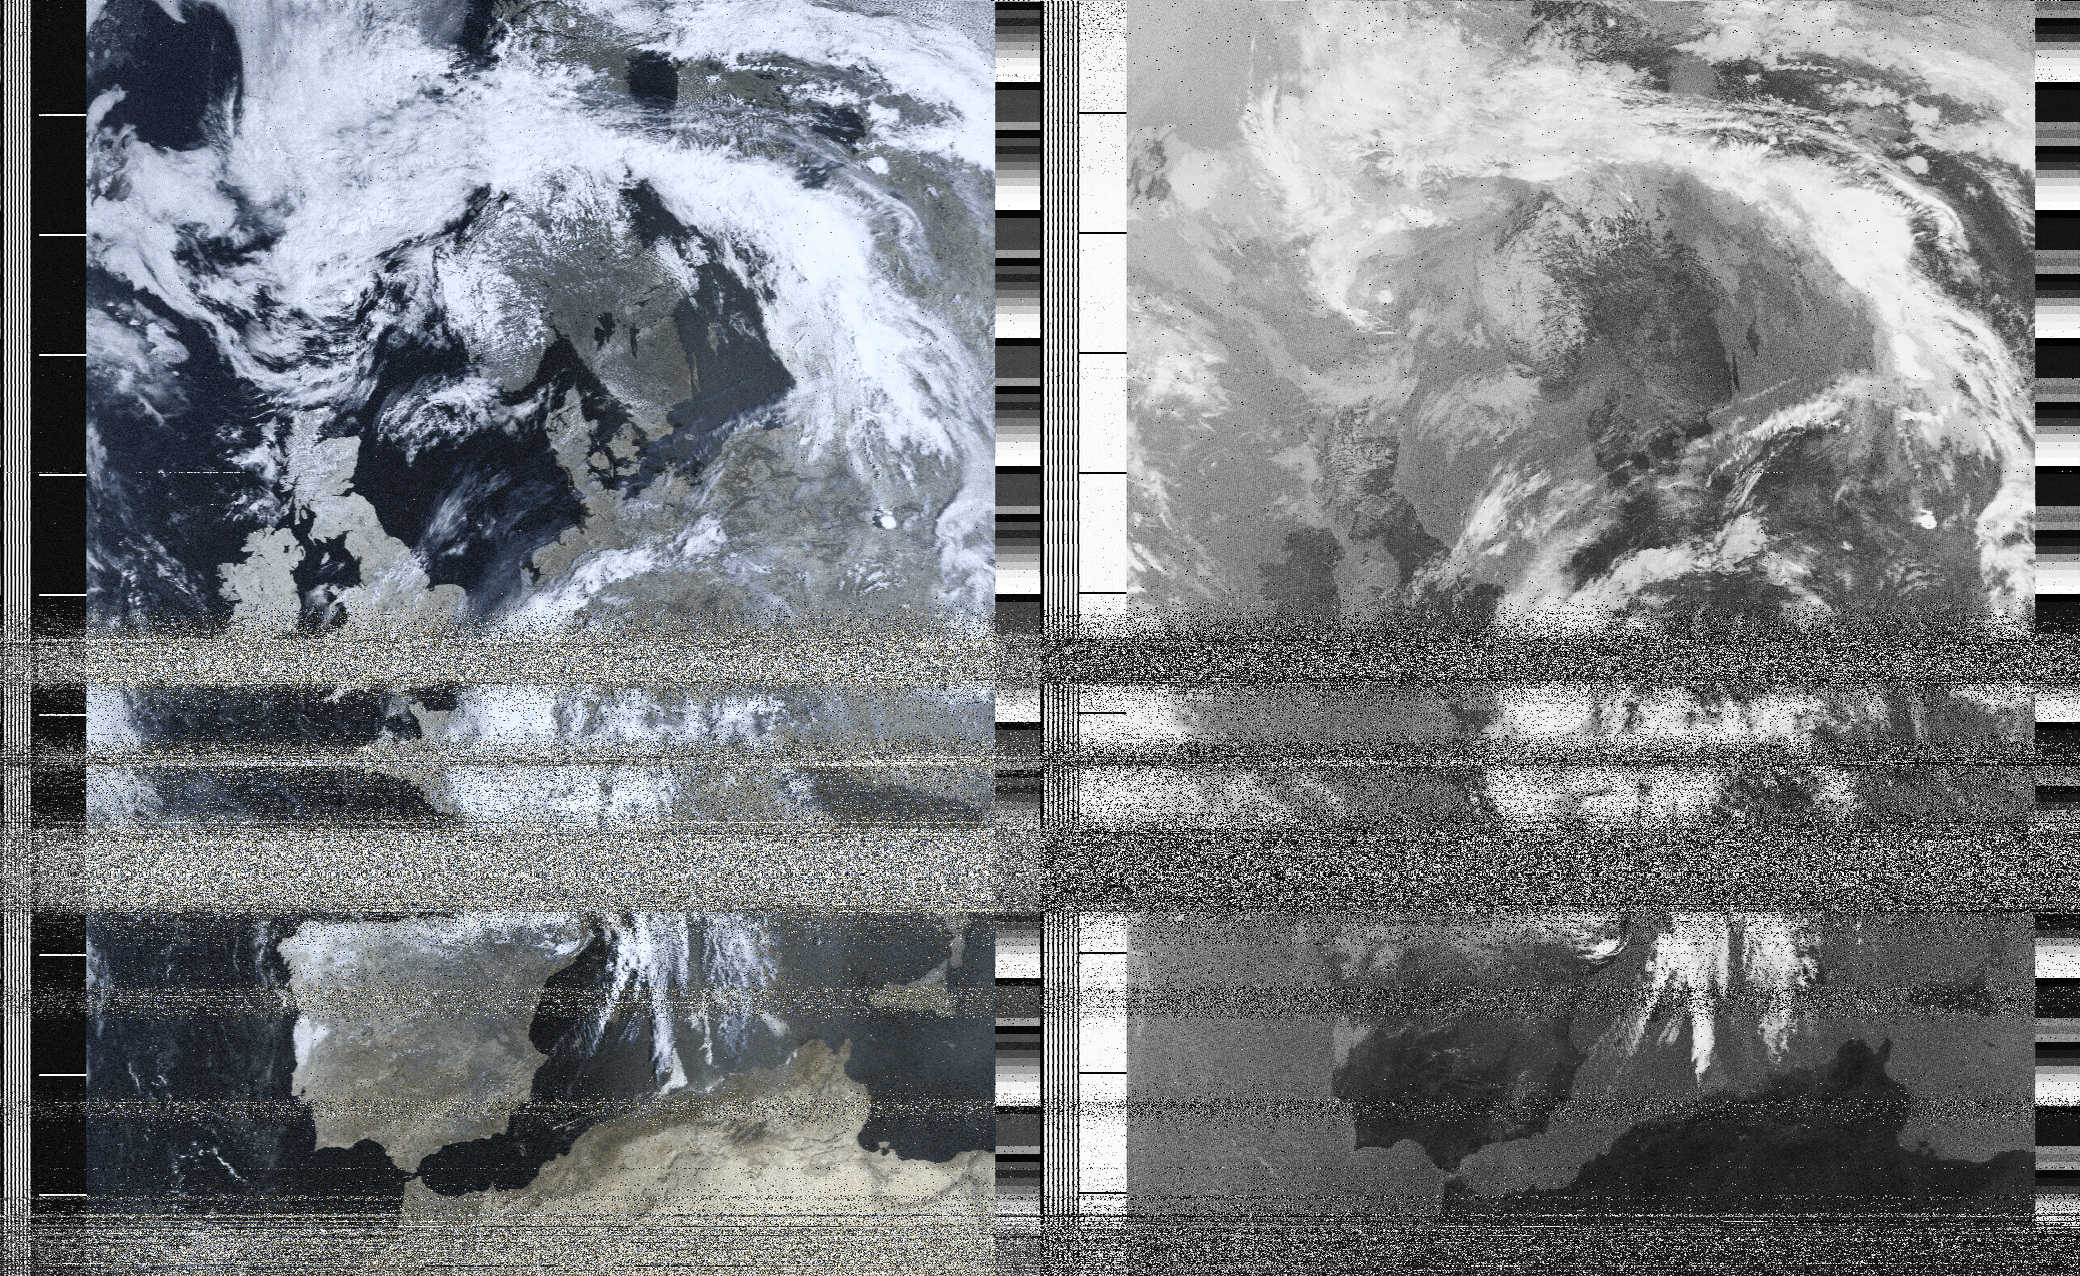
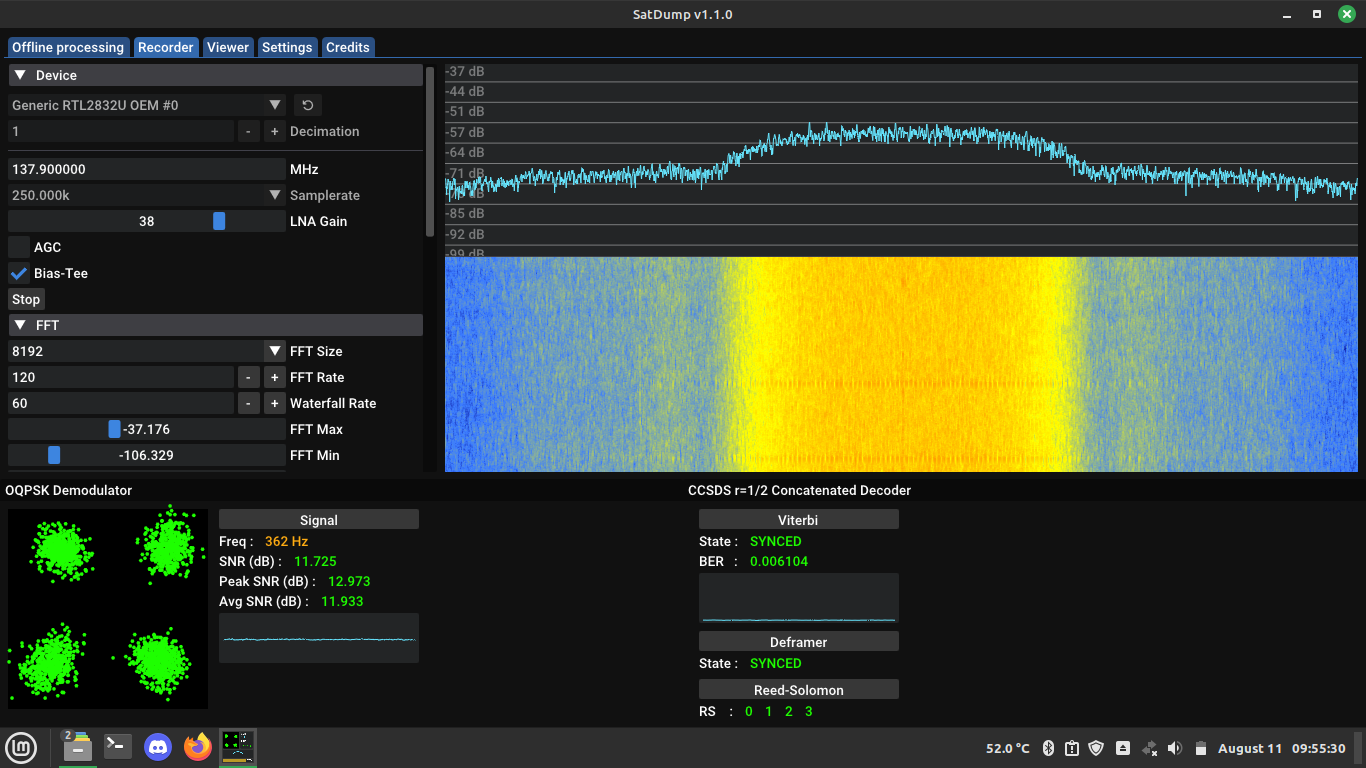
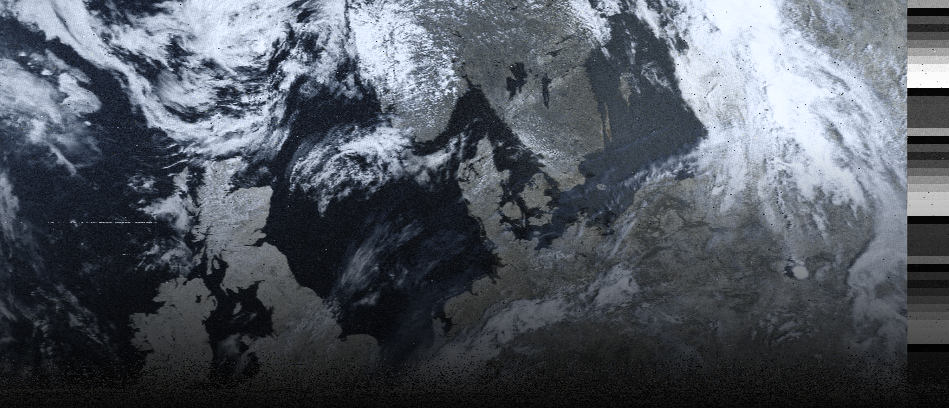
🇷🇺 Meteor M2-3 is a Russian satellite that is a part of the Meteor M series of polar orbiting weather satellites. The transmission signal is very different compared to the NOAA satellites, as it uses low-rate picture transmission (LRPT) signals instead of APT signals, resulting in a higher resolution, colour image. While APT is an analogue signal, LRPT is digital, transmitting an OQPSK modulated signal. Although its signal is different, it is just as easy to receive as NOAA satellites. Meteor M2-3 is currently their newest and only Meteor M satellite that transmits LRPT as the previous ones have suffered an early ending or partial ending to their mission from technical faults or micro-meteorite collisions.
| Name | Frequency (MHz) | Launched | Altitude | Inclination |
| Meteor M2-3 | 137.9 | 2023 June 27 | 820 km | 98.8° |
V-dipole antenna
The antenna I used to receive weather satellite signals is the V-dipole antenna that came in the RTL-SDR kit, but first let’s talk about what a dipole is. It is one of the simplest forms of an antenna, as it consists of only two conductors, called the legs, one is connected to the conductor inside of a coaxial cable, while the other is connected to the cable’s shielding. The legs need to be one quarter of the desired operating wavelength, so the total length of the antenna is double that. (Hence the name half-wave dipole.)
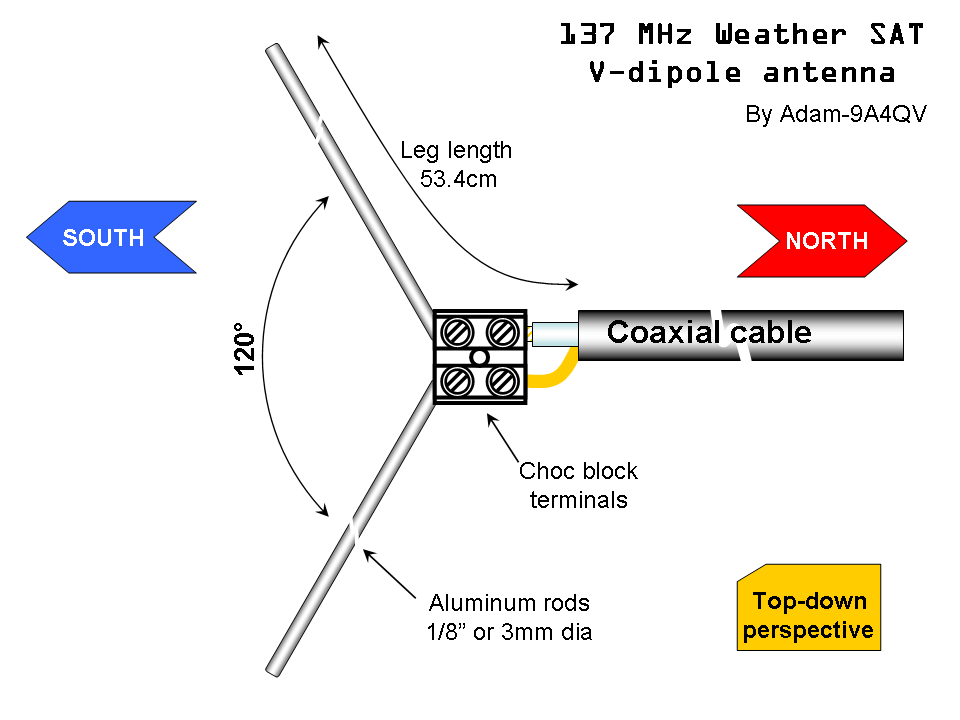
Dipole antennas are omni-directional, as they have blind spots to the two sides of the antenna, that means if we want to receive signals from satellites, we need to place it in a horizontal orientation, and by introducing a 120 degree angle to the two legs of the dipole, so we can mitigate the blind spots of the antenna. This is why it’s called the V-dipole, as it is now forming a V shape.
Since the design of this antenna is quite simple, it's easy to build one yourself, but because I already had the dipole antenna that came with the kit I bought, I used that, instead of a diy one.
There are some design principles that should be followed when building or setting up the antenna. The first, and most important one, is the length of the dipole’s legs, as that will directly influence the radio frequencies it will be able to receive signals at. The length of the dipole’s leg should be one quarter of the wavelength we want to receive signals at (L=λ/4). The wavelength at 137.5 MHz is 218 cm, with one quarter being 54.5 cm. Using this length for the legs should be fine, however the legs can be slightly shorter to compensate for some physical properties of the conductor material being used. For example, Adam-9A4QV’s antenna design uses only 53.4 cm for the length of each leg. So having each leg around 54 cm long should be fine, as APT and LRPT are relatively strong signals, a few centimetres shouldn’t make a noticeable performance difference!
The other important principle to follow while building the antenna is the 120° angle between the two legs, so the antenna forms a V shape. When setting up the antenna it should face North or South since polar orbiting satellites always travel North to South or vice versa, and lastly, the antenna should be mounted around 1 m above the ground, for that, I usually use a tripod to hold the antenna.
Of course, the V-dipole is not perfect, and comes with some inherent signal losses given by its design that will prevent it from achieving a perfect performance. One downside to the antenna is, that it is linearly polarized, while the signal coming from the weather satellites are circularly polarized. The transmitting source can send the signals with different polarizations: vertical, horizontal, and circular. Circular polarization is preferred for satellite communication because it is more tolerant of atmospheric conditions.
There are other antenna types, designed for receiving weather satellites, for example the QFH (Quadrifilar Helix), DCA (Double Cross Antenna), or the turnstile antenna. However, these are more complicated antennas than the V-dipole, and the best is to start with this, the simplest one, as it is advised to achieve the best results you can with it, and understanding how it works before moving on.
Tracking the satellites
Before we could receive any signals from the satellites, we need to know when the next satellite pass will occur. As mentioned before, these are sun synchronous satellites, so we can expect the passes at around the same time, each day.
There are multiple programs aimed at satellite tracking, one of these is GPREDICT. This software can track multiple satellites in real time, displaying their current location, and other information.
If you don’t want to bother with installing software, there is a website called N2YO, that you can access from your phone too, which can be useful. Similarly, to GPREDICT, N2YO displays the location of the tracked satellite (or multiple ones), with its footprint. It tells you which frequency the satellite’s downlink is operating at, and you can get 10-day predictions on the selected satellite’s passes.
I created this widget on n2yo.com, displaying the four weather satellites this project was focused on, you can choose which one to be displayed from the drop-down menu.
Software
After the equipment is ready and we know when the next pass, it’s time to receive these satellites’ signals. Just to sum it up, in order to receive anything, we need an SDR, a suitable antenna, some coaxial cable, and a computer (a laptop of course, for portability), and something to mount the antenna onto, for example a tripod.
Before we could use the SDR though, we need the appropriate drivers for it to work. These SDRs aren’t quite plug&play so first, you need to install custom drivers to make them work properly. I’ve got the RTL-SDR Blog’s SDR, so I went to their page to download and install my drivers. I installed these drivers to both my Windows and Linux computers, and the SDR works with both systems without a problem.
The last piece of the puzzle is, of course, the software that we can interface the SDR with, and record what it is currently picking up on the radio spectrum, and maybe even decode it at the same time.
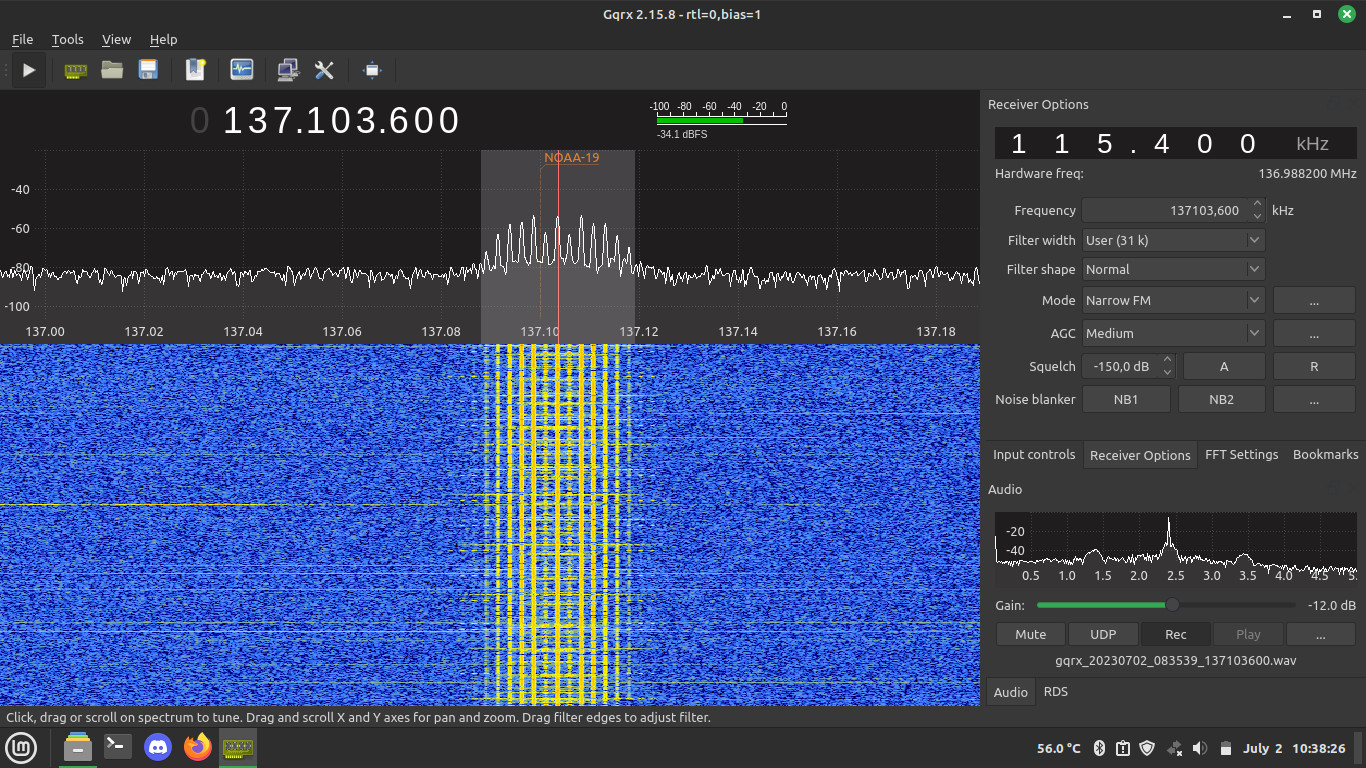
There are multiple spectrum analyzer programs for SDRs, with one of the most popular being SDR# for Windows. Because I used my laptop for this project, which has Linux installed on it, I used the software called gqrx. There are cross-platform programs like SDR++, but I haven’t tried that one yet.
With these programs we can only record the signal, to decode it, we need to use another piece of software. In case of APT, the recording should be in wav format (for LRPT I used a different program but about that later).
To decode the recording, first I wanted to use WXtoImg, as that was mentioned on multiple forums, but turns out, it’s a long-abandoned software, and others recommended a newer one that is actively updated, called noaa-apt.
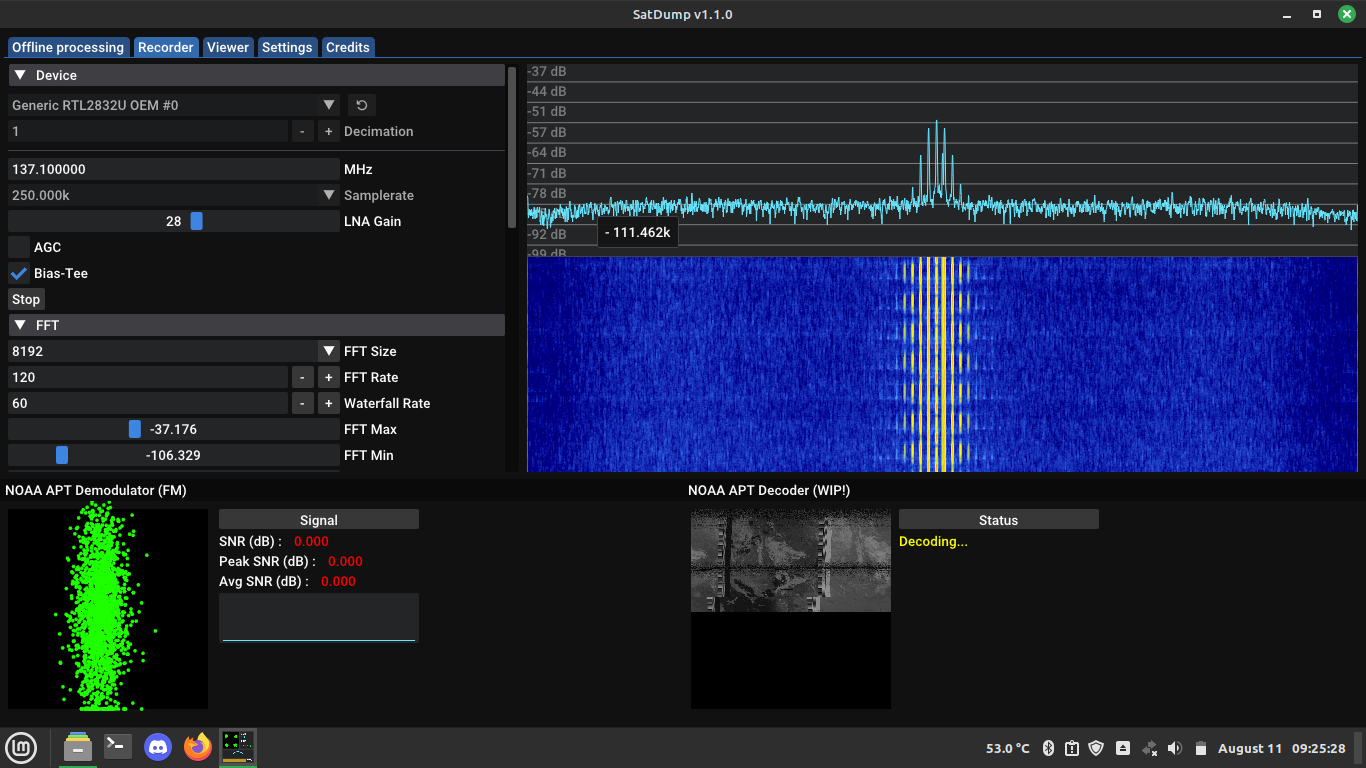
Decoding Meteor’s signal was always a complicated process, but nowadays its much easier with a new program called SatDump. It’s easy to use and can be used to decode not only METEOR but NOAA and many other satellites’ signals. To decode LRPT I only used SatDump, but for APT I used both methods of simply just recording in gqrx then decoding in noaa-apt and the other method of just using SatDump to record and decode the signal at the same time.
Receiving and decoding the images
On my first few tries, I used gqrx and noaa-apt. Using gqrx (or SDR#, or any other similar software) is quite simple, the first step is always to choose your SDR you are using from the program’s device list. Then the next step is to select the frequency you want to listen to, and select the modulation, in case of APT choose narrow or wide FM, with a bandwidth of around 40kHz so nothing gets cut off.
After the right frequency was set (see the table a few chapters before), and recording in gqrx, one more important factor to look for is the Doppler shift, or Doppler effect. As the satellite is approaching towards the antenna, the frequency is slightly higher and as the satellite moves away from the antenna, the frequency becomes lower. Since the Doppler effect is present, the frequency of the spectrum analyzer must be changed to keep the signal frequency centered.
When any of the NOAA satellites were passing above, in the program’s record tab I selected to record in wav format, and when I started hearing the signal, I hit record, when needed, I changed the frequency a bit because of the Doppler effect. When the pass was over, and the signal faded out I stopped recording.
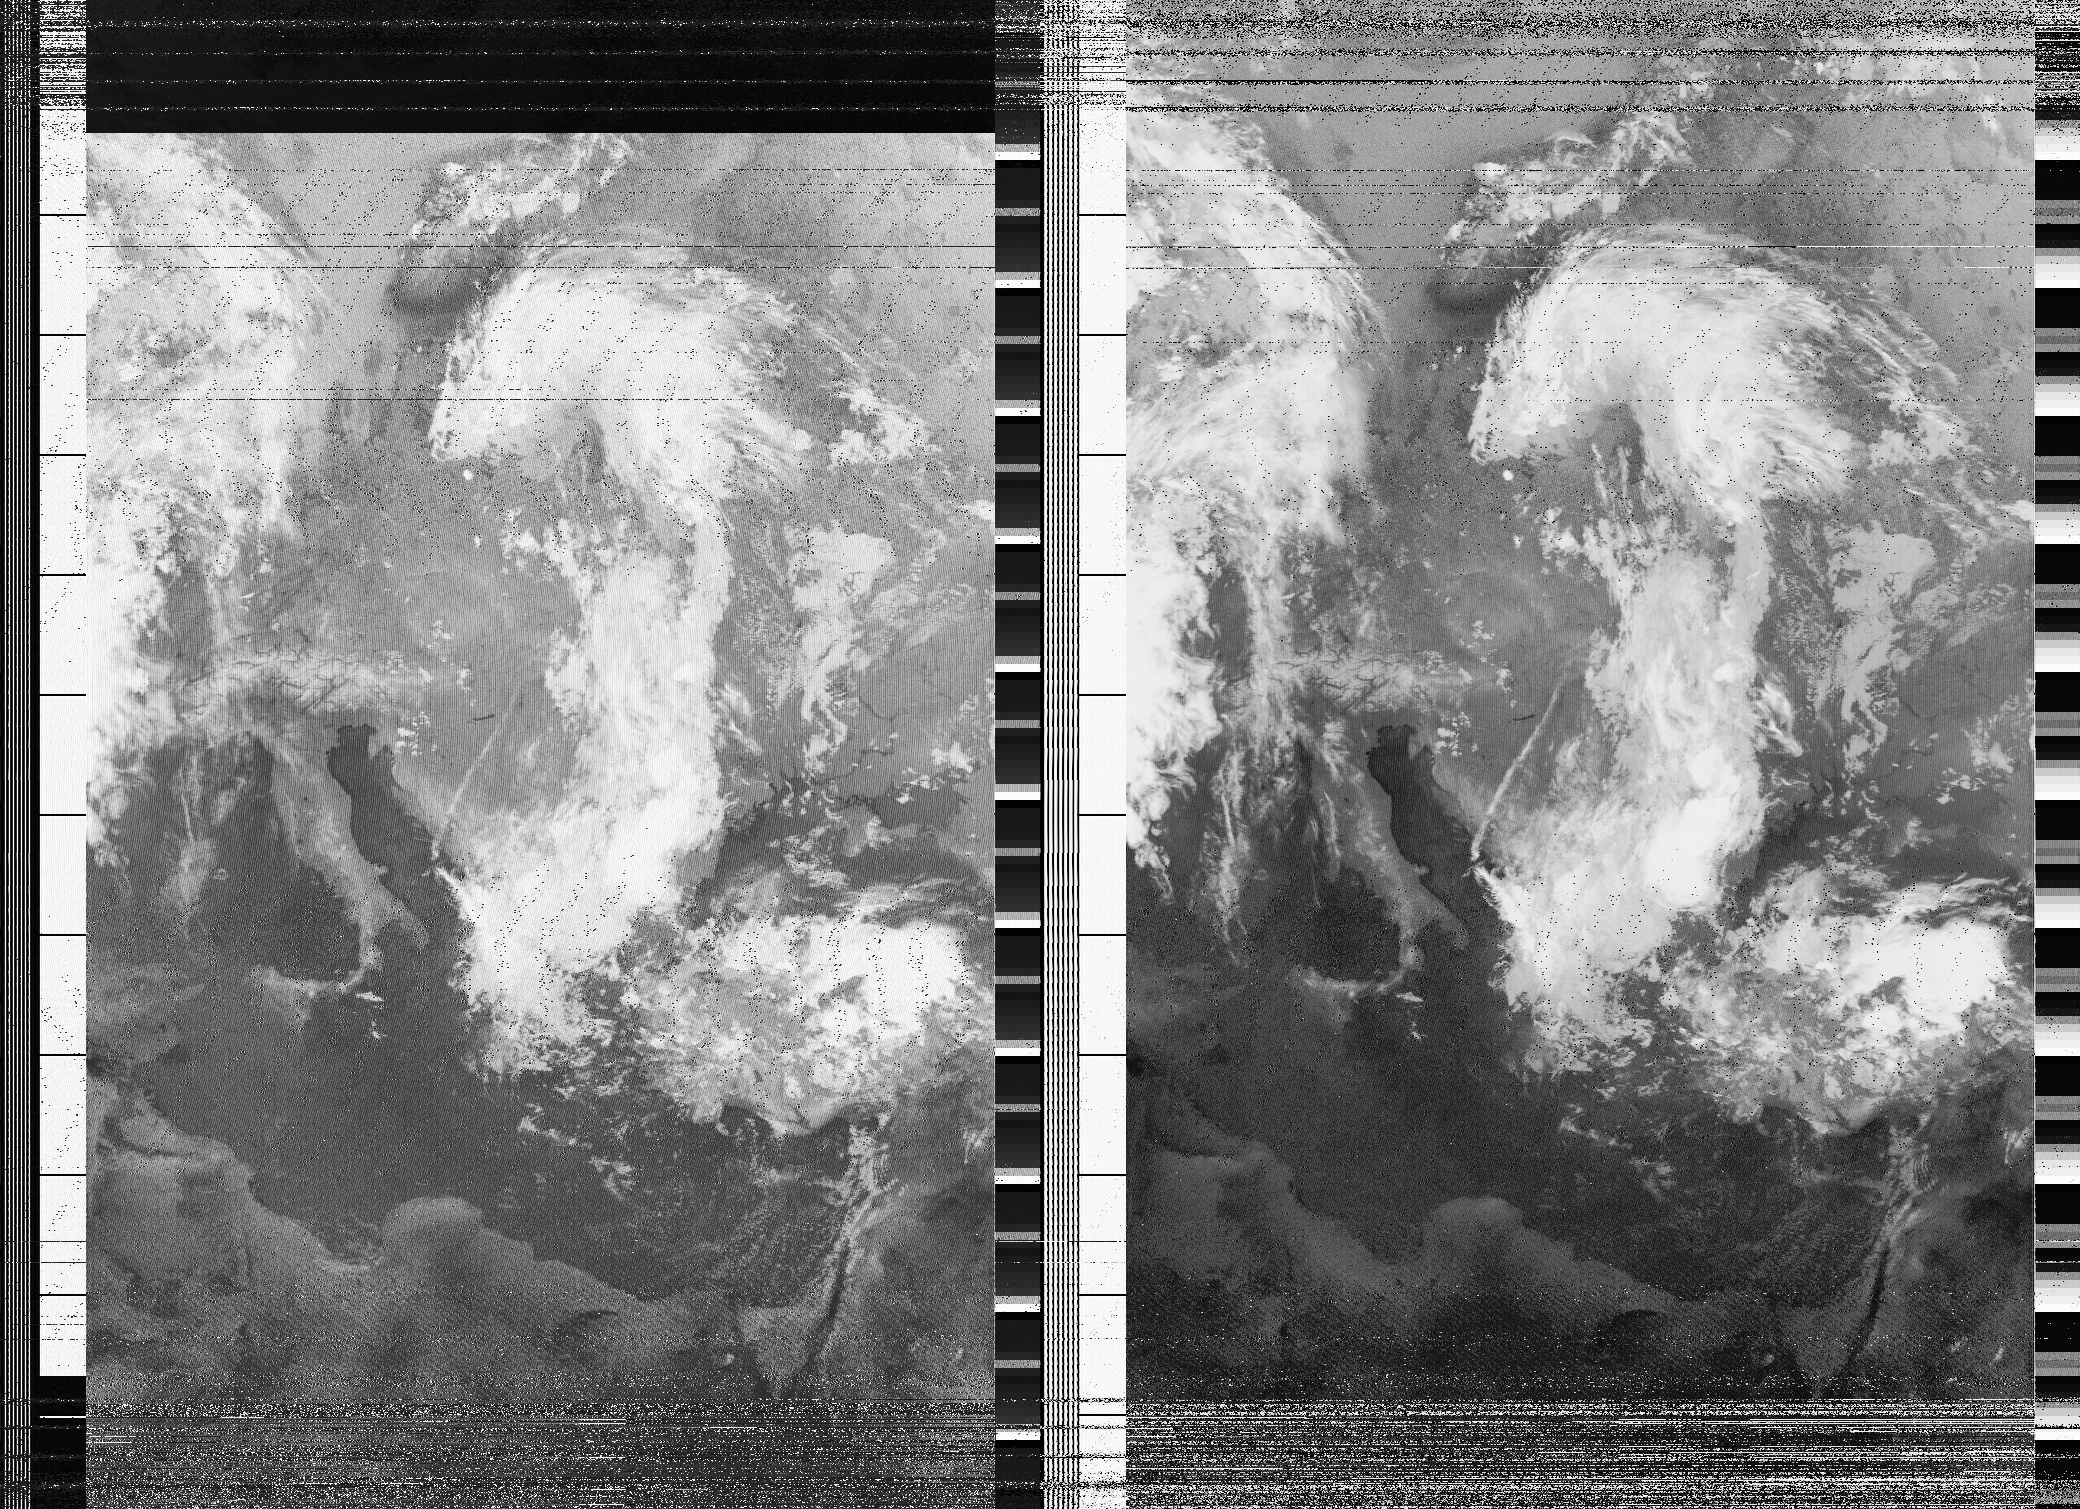
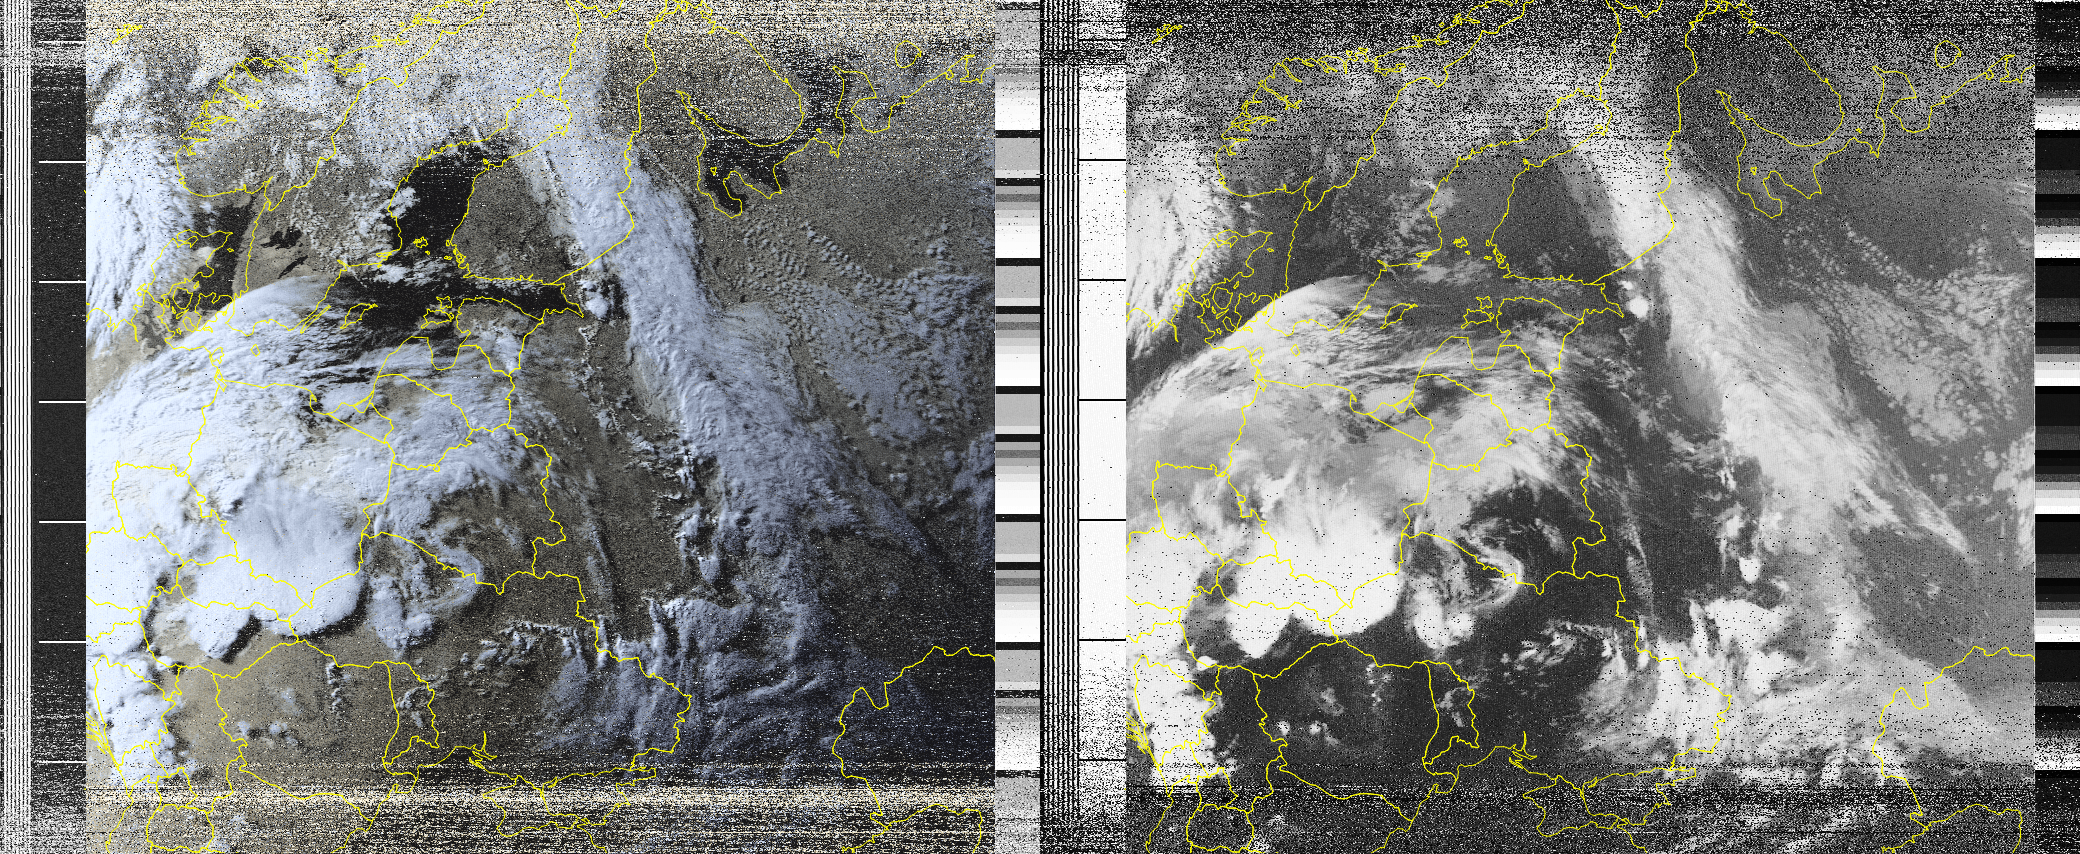
Then, in noaa-apt I selected my newly recorded wav file and waited for it to decode. After its done, there are options to use colour filters on the decoded greyscale image, and even to draw country borders to the image.
On my first try I set up my antenna on my balcony and waited for the satellite and recorded its signal while it passed. After decoding the image, it was nothing but noise, I learned that because of the amount of interference in a residential area, it’s hard to pick up the signal. In order to mitigate the interference, I went out to a big open field, and on my next try, everything worked out, and I got my first image directly from a weather satellite.
When I started this project I focused only on the three NOAA weather satellites, as the previous METEOR satellites weren’t operational anymore. But in June the METEOR M2-3 was launched, and LRPT was back once again. I looked into how I could decode its signal when I came across SatDump. It’s a much easier way to decode the signals than the previously mentioned method. After selecting the SDR and tuning in to the correct frequency, setting the gain, the program does everything else for you. It takes into account the Doppler effect, and while the satellite passes it can already decode the image.
I still couldn’t record an interference free image from METEOR M2-3, but after reading about the topic, it seems that others had no luck either, so maybe there is a problem with the satellite itself. However, you can see the difference between how interference looks on the analogue and on the digitally transmitted pictures. On the pictures which are from NOAA satellites the interference shows up as noise, but on the pictures transmitted digitally by METEOR it’s just blank lines.
Sources and useful links
- RTL-SDR Tutorial: Receiving NOAA Weather Satellite Images
- Meteor M2-3 Now In Orbit and Transmitting Weather Images
- Decoding Signals From Weather Satellites Using Software Defined Radio - Min Jae Lee
- NOAA POES Series - 5th Generation
- Listening to Weather Satellites with Random Junk
- Satellite Ground Station With Trash, Cardboard, and Foil Tape!
- Grabbing Images From New Russian Satellite (Meteor M2-3)
- The V-dipole antenna || Satellite reception pt.4
- Receive METEOR weather satellite images with RTLSDR and GQRX on Linux
